
How To Fix Cannot Access Shared Folder Error in Windows 11 | Network Sharing
“Are you trying to access a shared folder on your Windows 11 PC but keep running into errors like ‘You don’t have permission’ or ‘Network path not found’? In this video, I’ll walk you through the 10 real fixes that work — fast and easy.”

[Step 1: Set Both PCs to Same Network]
- Open Command Prompt and run: ipconfig
- Make sure IP range matches on both devices. 🎙️ “First, ensure both PCs are on the same Wi-Fi or LAN.”
[Step 2: Enable Network Discovery & Sharing]
On both the host (shared folder) and client (accessing) PC:
- Go to Control Panel > Network and Sharing Center
- Click Change advanced sharing settings
- Under Private, turn on:
- Make sure the network is set to Private, not Public:
- Settings > Network & Internet > Ethernet/Wi-Fi > Network name
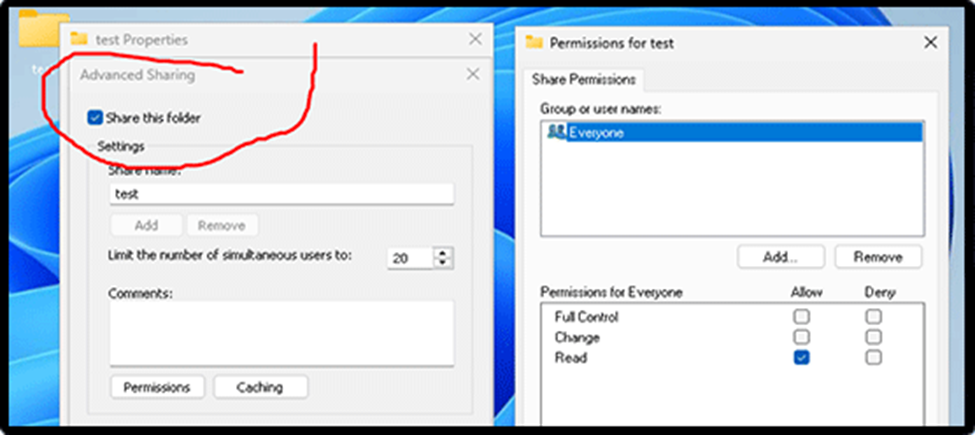
- Right-click the folder → Properties > Sharing > Advanced Sharing
- Check: ✅ Share this folder
- Click Permissions, and give Read/Write access to Everyone or specific users.
- NTFS Security Permissions: In the same Properties window, go to the Security tab. Ensure the “Everyone” group is listed with at least Read permissions. If not, click Edit, then Add, type “Everyone,” and click OK.
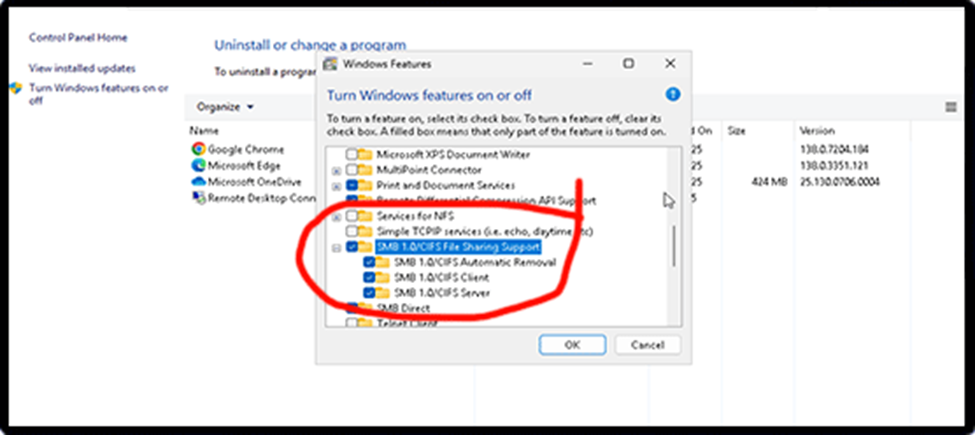
- Control Panel > Programs and Features > Turn Windows features on or off
- Enable: SMB 1.0/CIFS File Sharing Support
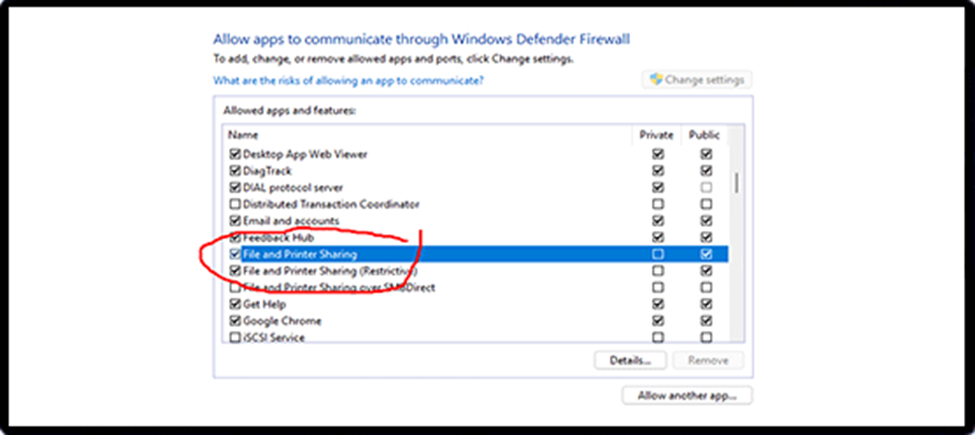
- Open Windows Security > Firewall & network protection
- Click Allow an app through firewall Enable
- File and Printer Sharing
- Network Discovery
- Go to Settings > Network and internet > Advanced network settings > Advanced sharing settings > All Networks
- Scroll down and Turn off password-protected sharing
- Function Discovery Provider Host
- Function Discovery Resource Publication
- SSDP Discovery
- UPnP Device Host
- Server
- Workstation
- ipconfig /flushdns
- netsh int ip reset
- netsh winsock reset
✅ Network Discovery
✅ File and Printer Sharing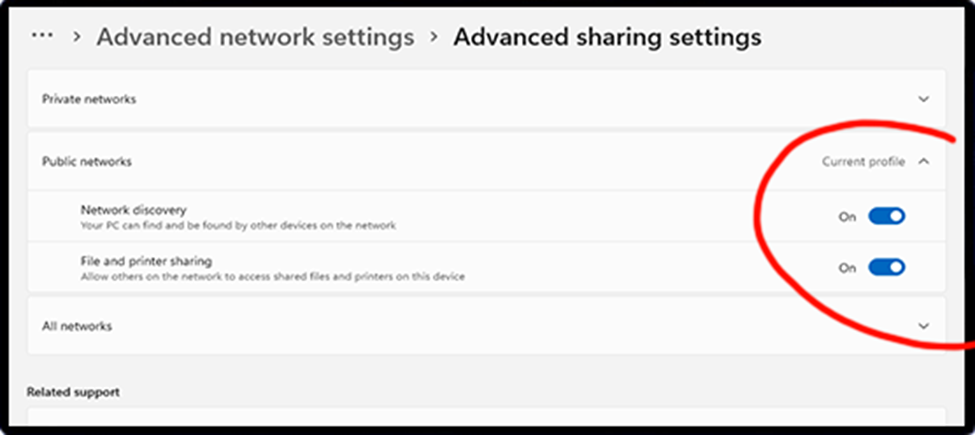
[Step 3: Set Network to Private]
🎙️ “Set your network to private to allow sharing.”

[Step 4: Share the Folder Correctly]
On the shared folder PC:
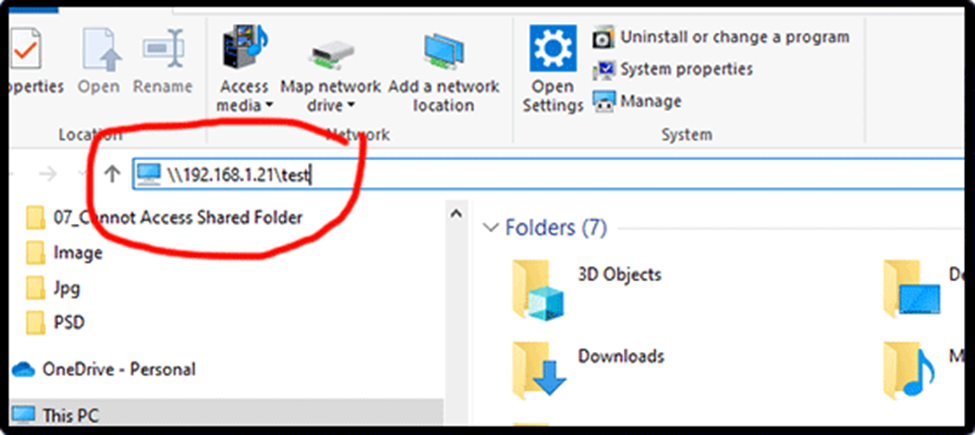
[Step 5: Access Folder via IP Address]
🎙️ “Instead of \\ComputerName, try using the IP like \\192.168.1.21\test.”
[Step 6: Enable SMB Protocol (Optional)]
⚠️ Only use this if connecting to older devices, which is often disabled for security.
[Step 7: Allow Through Windows Firewall]
Make sure file sharing isn’t blocked:
[Step 8: Turn Off Password Protected Sharing (Optional]
If you don’t want a password when accessing:

[Step 9: Restart Services – 3:10]
Open Services (Press Windows Key + R, type: services.msc). Find the following services and make sure their Startup type is Automatic and their Status is Running:
🎙️ “These background services help devices discover shared folders.”

[Step 10: Reset Network Stack]
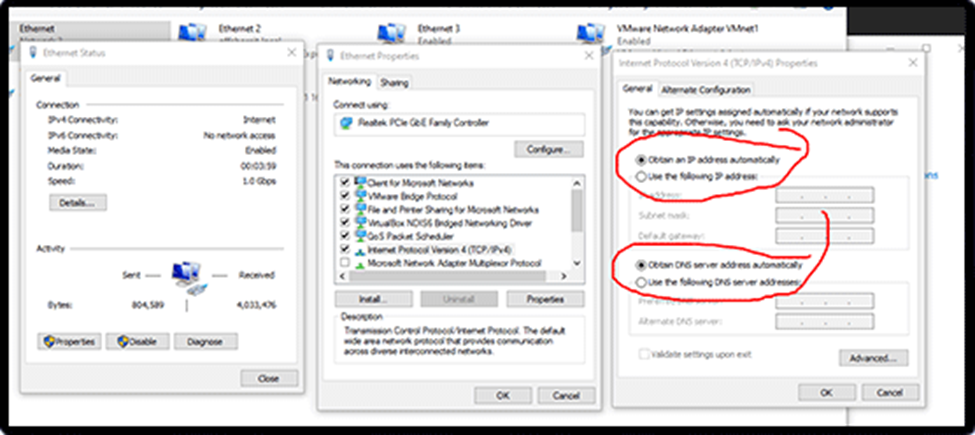
Run in Command Prompt (Admin). DHCP to automatically obtain network configuration parameters, most notably an IP address, from a DHCP server :
🎙️ “Finally, reset your network settings and restart your PC.”
🎙️ “Now your shared folder should be accessible from any device in your network.